TL;DR: Upload two ISOs (
Win_Pro_11_2*H*.isoandvirtio-win.iso), create a VM with OVMF (UEFI) and TPM 2.0, attach both ISOs, set the disk bus to VirtIO, then load the VirtIO storage driver during Windows setup.
🛠️ Getting Started… #
Setting up a Windows 11 VM on Proxmox has its challenges, so I thought I’d share my experience to help make yours less frustrating. 🙂
At the time of this guide I’m running Proxmox 9.0.10, installing Windows 11 25H2, and utilizing the VirtIO Drivers 0.1.285.
You can use the links below to download the software listed above.
⚙️ Setting Up Your Virtual Machine #
To get started be sure you upload the ISOs for Windows and the VirtIO drivers to your Proxmox server.
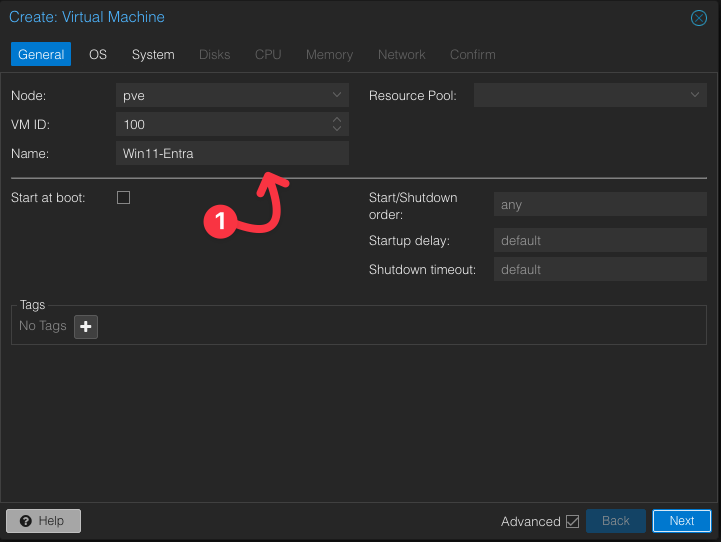
Next create a new virtual machine. Give it a name (1) and click next.
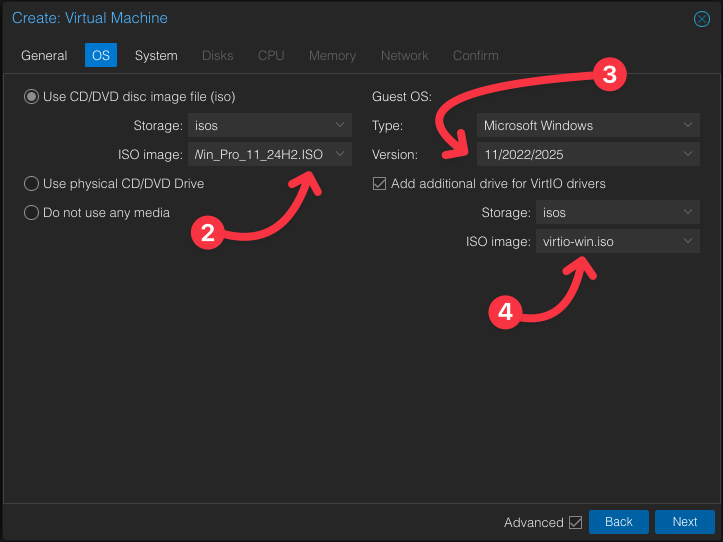
On the OS options select your Windows ISO file (2), set the version of Windows you are installing (3), and finally add the VirtIO driver ISO (4). The image shows 24H2 is but the install relies on the latest ISO.
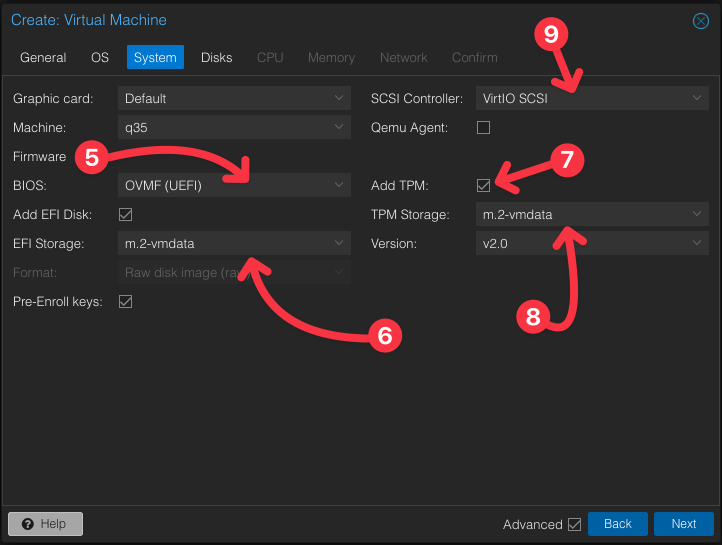
On the System options select OVMF (UEFI) for the BIOS setting (5). Next select where to store your EFI data (6). Follow that with adding the required TPM option (7) and add its storage location (8). Finally set the SCSI Controller to VirtIO SCSI (9).
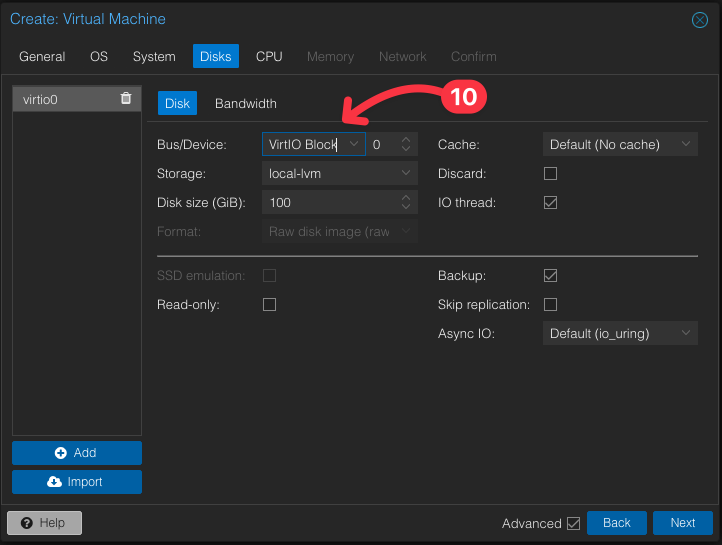
For the Disk options my only edit was the Bus/Device option (10). Where I set it to VirtIO Block.
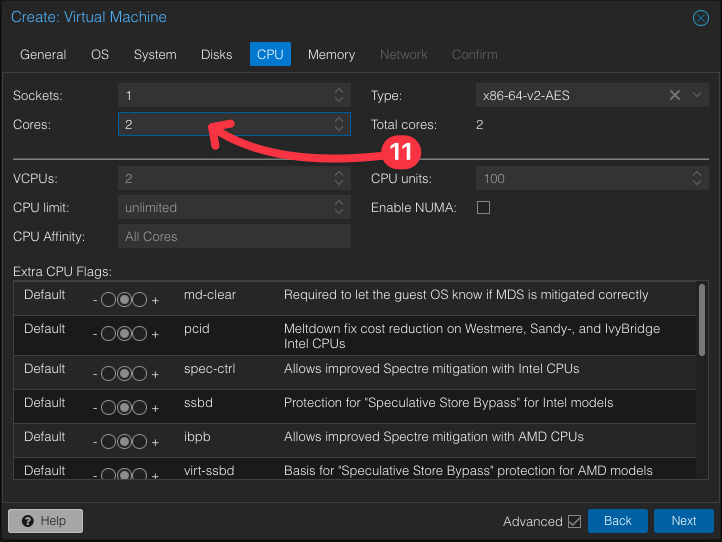
The CPU option will depend on your setup. In my home lab I’m using this machine for Entra and Intune testing so be sure to bump the cores (11) if you need them.
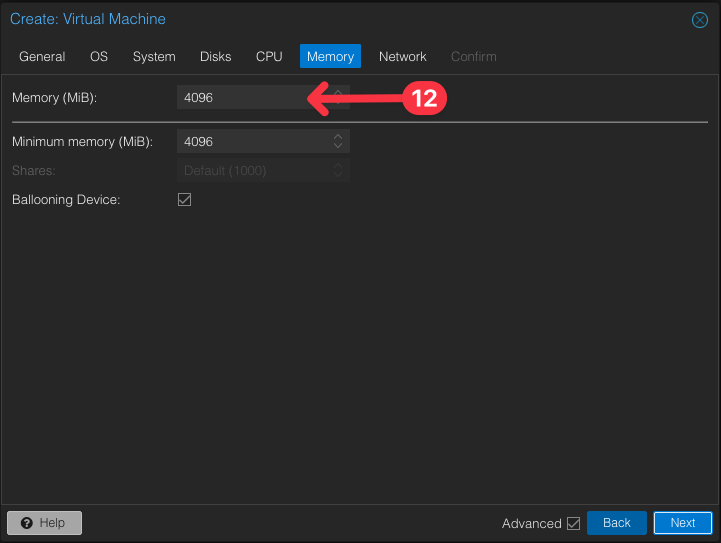
On Memory (12) again I’m shooting for minimum specs to try to see if I can make it work for me.
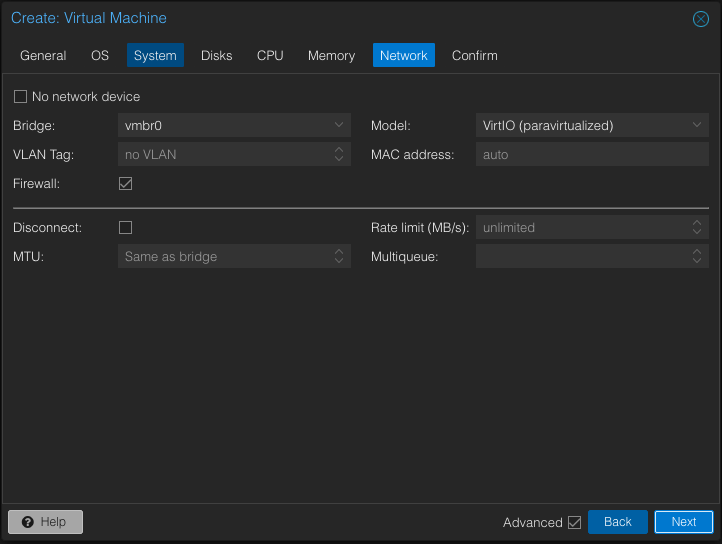
On the network side of things I made now changes. :)
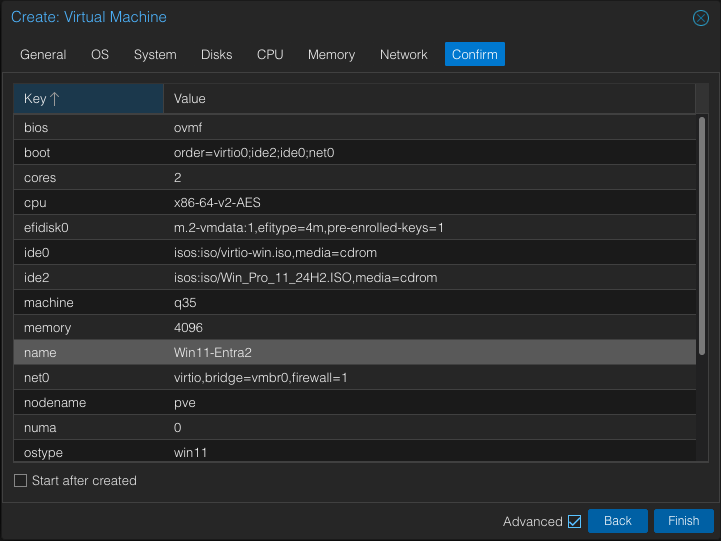
You can then look over you configuration on the Confirm page to be sure things are to your liking and then click on finish.
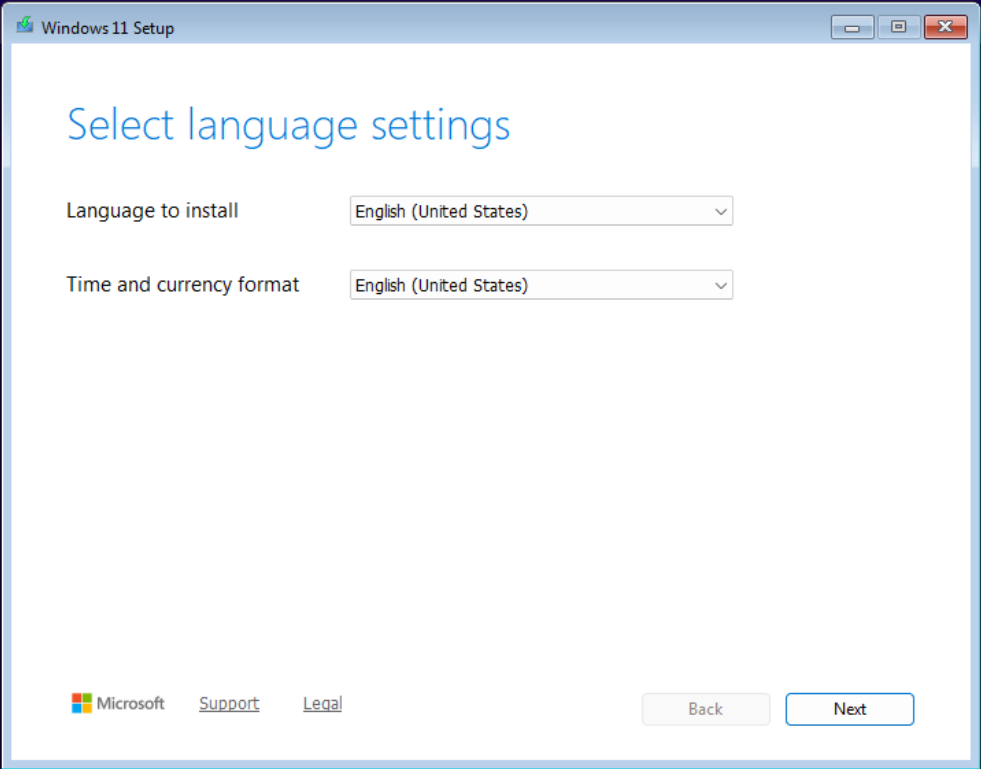
Now hopefully you are looking at a fresh Windows installer. :D
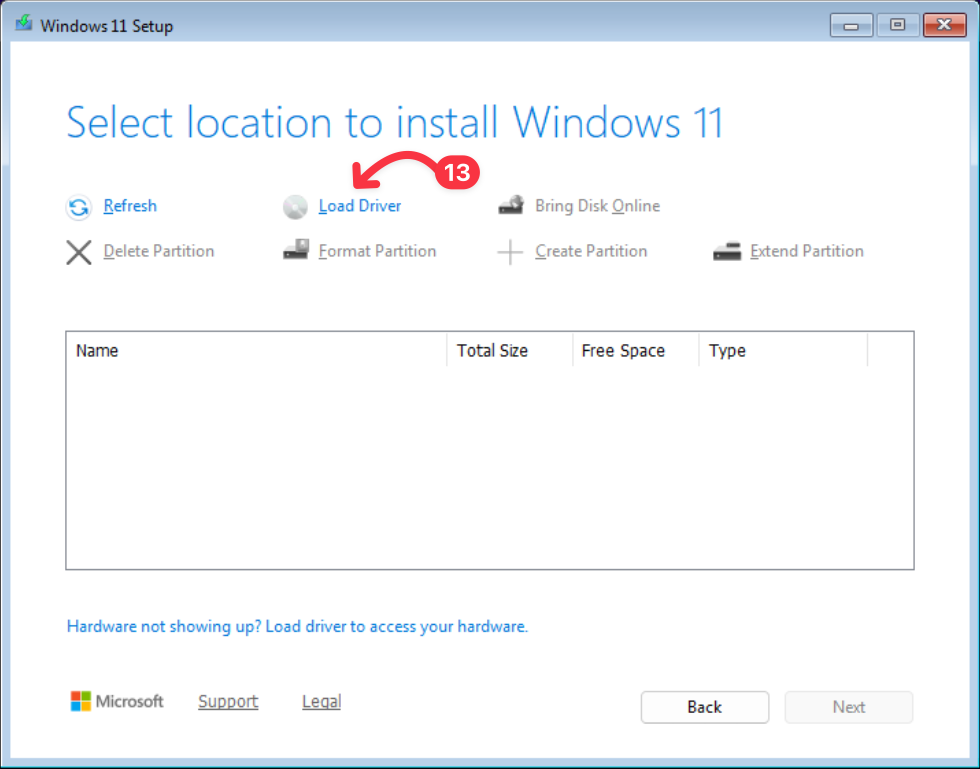
The last step that’s not the norm will be you need to load the VirtIO drivers for the ISO we included earlier. Select Load Driver (13) from the Select location to install Windows 11 dialog.
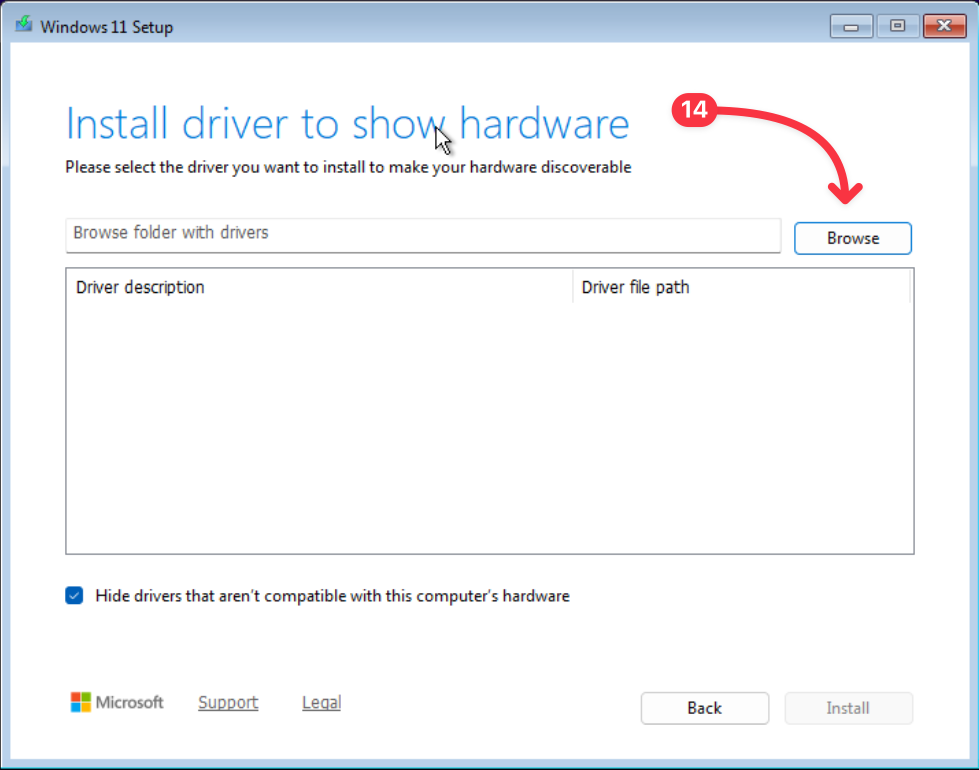
Next click the Browse button (14).
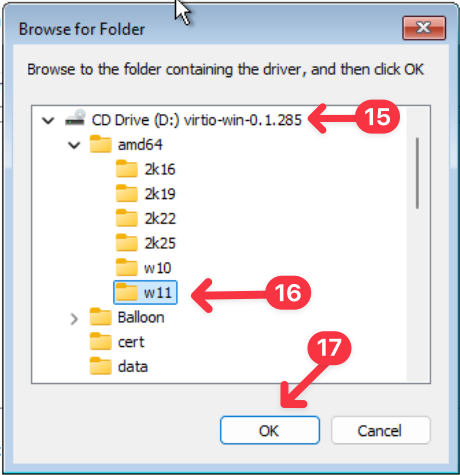
Then select the VirtIO disc (15) then open the amd64 folder select the w11 folder within (16) and press OK (17).
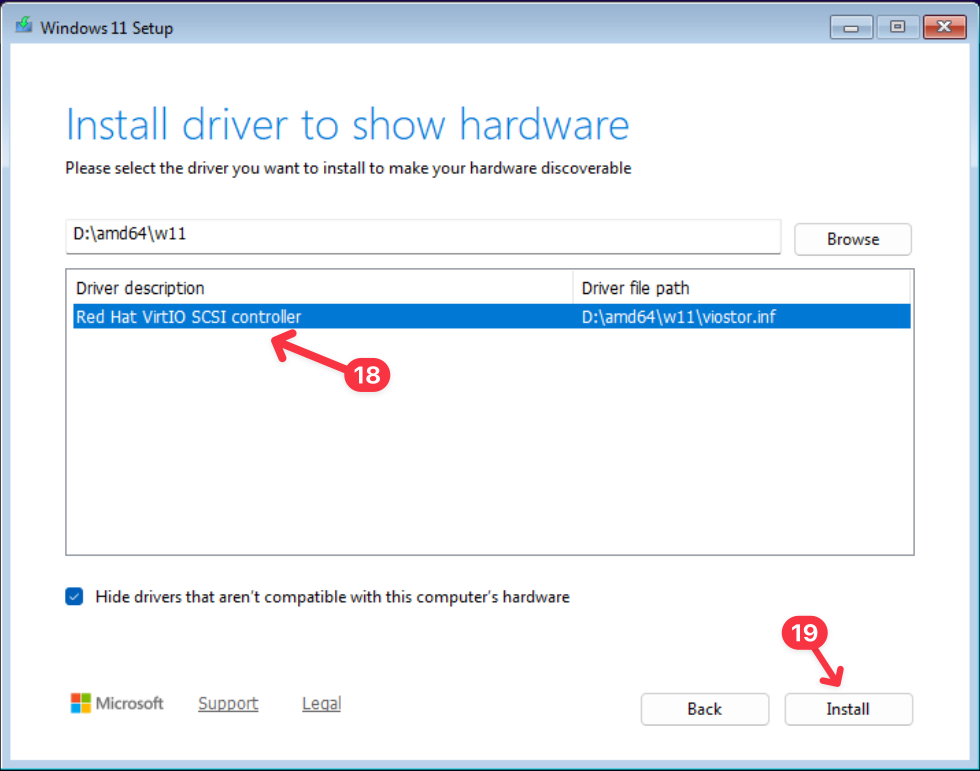
On the Install driver to show hardware screen select the new Red Hat VirtIO SCSI controller option (18). Then press Install (19).
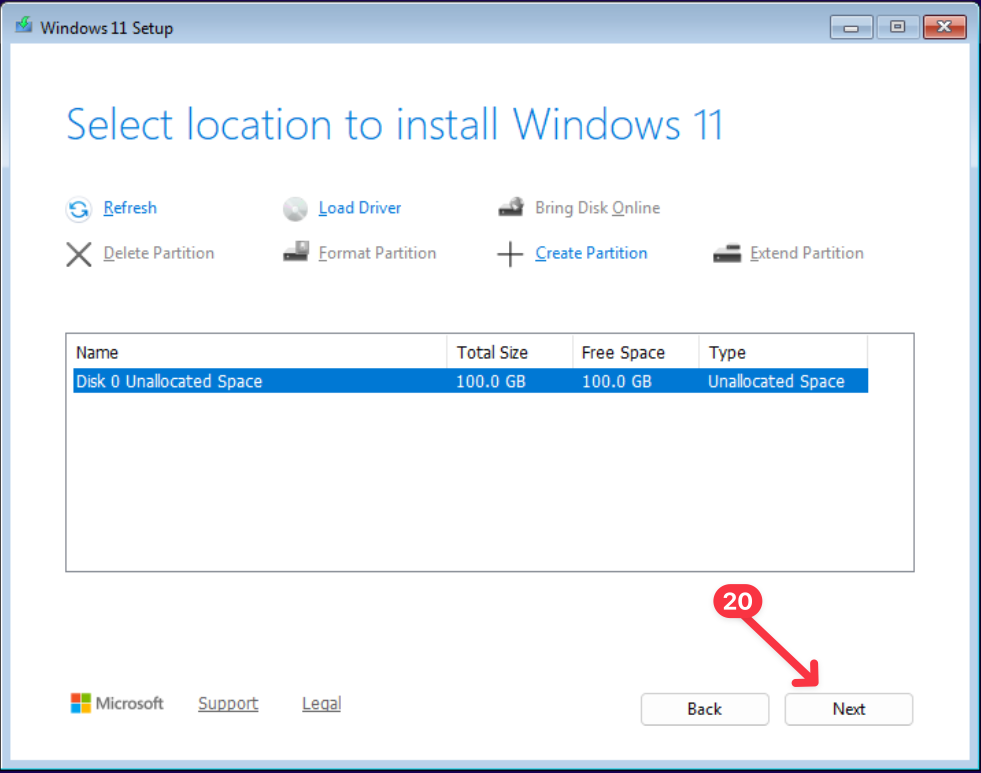
You should now be ready to install Windows 11, press Next to continue (20).
💡 Post‑install (Options) #
- Run
virtio-win-guest-tools.exefrom the VirtIO ISO to install QEMU Guest Agent and drivers (NetKVM, Balloon, etc.). - Remove both ISOs and reboot.
- Enable Windows Update to grab any newer drivers.
- Optional: use Secure Boot (OVMF with pre‑enrolled keys) if you want a fully “green check” configuration.
⚠️ Troubleshooting #
- No disk visible after loading drivers? Make sure you chose the folder that matches your bus type (
viostorfor VirtIO Block,vioscsifor SCSI). - TPM/Secure Boot complaint? Confirm Add TPM (v2.0) is enabled; Secure Boot can be turned on by checking Pre‑Enroll keys in the System tab.
- No network during setup? Install
NetKVM/w11/amd64from the VirtIO ISO. - Mouse/keyboard lag in console? Use the SPICE display and virtio graphics driver after install.
I hope this helps you get Windows 11 up and running in your home lab. - Corey 🎉